Keeping your Subaru stopping right is pretty important, right? Whether you drive a tough Crosstrek or a comfy Legacy, good brakes mean you can drive with more confidence. Over time, those brake pads and rotors wear out. Doing the replacement yourself can save you some cash and feel pretty good. It might seem like a big job, but with the right tools and a bit of patience, it’s totally doable. This Subaru brake replacement guide will walk you through it, step-by-step. If you’re not feeling up to it, Cascade Subaru in Wenatchee is always ready to help with your Subaru brake service.
Key Takeaways
- Gather all your tools and the correct new parts before you begin your Subaru brake replacement.
- Safely lift and secure your Subaru using jack stands before removing any wheels.
- Carefully remove the old brake caliper and rotor, noting the position of parts.
- Install new pads and rotors, clean components, and lubricate contact points for smooth operation.
- Always test your Subaru’s brakes thoroughly after replacement before driving normally.
Gathering Your Subaru Brake Replacement Tools
Alright, let’s talk about getting ready for this brake job on your Subaru. Before you even think about jacking up the car or messing with lug nuts, you need to make sure you have everything lined up. It’s like packing for a trip – you don’t want to get halfway there and realize you forgot your toothbrush, or in this case, a critical tool. Having all your ducks in a row beforehand makes the whole process go so much smoother, trust me.
Essential Tools for Brake Pad Replacement
So, what do you actually need to get this done? You’ll definitely want a good set of wrenches and sockets. A torque wrench is also a must-have; you don’t want to guess on how tight those bolts should be. You’ll need something to compress the brake caliper piston, like a C-clamp or a specialized brake caliper tool. And don’t forget a jack and a sturdy set of jack stands – safety first, always. A lug wrench is obvious, but make sure it fits your Subaru’s lug nuts properly. Oh, and a bungee cord or a piece of sturdy wire is handy for hanging the caliper out of the way so it doesn’t just dangle by the brake line. That’s a big no-no.
Parts Needed for Your Subaru Brake Job
Obviously, you need new brake pads and rotors. Make sure you get the right ones for your specific Subaru model and year. It sounds simple, but grabbing the wrong part can really set you back. It’s also a good idea to have some brake fluid on hand, just in case you need to top it off or bleed the system a bit. Some people like to have new hardware clips for the pads too, though it’s not always strictly necessary.
Optional Lubricants and Cleaners
While you’re at it, grabbing a can of brake cleaner is a smart move. You’ll want to clean off any gunk or old grease from the caliper bracket and maybe even give the new rotor a quick wipe-down before you install it. A little bit of brake lubricant for the contact points where the pads meet the caliper and bracket can go a long way in preventing squeaks and ensuring smooth operation. Some folks also use a bit of anti-seize compound on the wheel hub where the rotor sits, which can make future rotor removal a lot easier. It’s not strictly required, but it’s a nice touch.
Working on your brakes is serious business. If you’re not comfortable with any part of this process, or if you don’t have the right tools, it’s always better to take it to a professional. Your safety and the safety of others on the road depend on it.
Preparing Your Subaru for Brake Maintenance
Parking the Vehicle Safely
Before you even think about touching a wrench, the very first thing you need to do is get your Subaru parked safely. Find a spot that’s completely level and solid. You don’t want your car rolling even an inch while you’re working on it. Once it’s parked, make sure to engage the parking brake firmly. This is a simple step, but it’s super important for keeping things stable.
Initial Lug Nut Loosening
Now, with the car still firmly on the ground, grab your lug wrench. You’re going to loosen the lug nuts on the wheels you’ll be working on. Don’t take them all the way off – just break them loose. Give them about a half to a full turn counter-clockwise. This makes them much easier to remove later when the wheel is off the ground and spinning freely.
Checking Brake Fluid Levels
This is a step a lot of people skip, but it’s really worth paying attention to. Pop the hood and find the brake fluid reservoir. Check the level against the "MIN" and "MAX" lines. If it’s low, you’ll need to top it up with the correct type of brake fluid for your Subaru. If it’s really low, it might mean there’s a leak somewhere, which is something you’ll want to investigate further. Having the right amount of brake fluid is key for your brakes to work correctly.
When you compress the brake caliper pistons later on to fit the new pads, the fluid level in the reservoir will rise. If it’s already at the very top, you might need to siphon a little bit out to prevent overflow. Just use a clean turkey baster or a small siphon pump and a clean container.
Here’s a quick look at what you’re aiming for with your brake fluid:
| Component | Recommended Level |
|---|---|
| Brake Fluid | Between MIN and MAX |
| Reservoir Cap | Securely fastened |
Lifting Your Subaru and Removing Wheels
Alright, time to get your Subaru up in the air so you can actually get to those brakes. This part is all about safety first, always. You don’t want your car deciding to take a nap on the ground while you’re working on it, right?
Safely Lifting the Vehicle
First things first, make sure your Subaru is parked on a nice, flat, solid surface. No slopes, no soft dirt. Engage that parking brake firmly. Now, grab your jack. You’ll want to find the correct jacking point for your specific Subaru model – check your owner’s manual if you’re not sure. Position the jack and start raising the vehicle. You need to lift it high enough so that when you put the jack stands in place, the wheel will clear the ground with a bit of room to spare. Never, ever get under a car supported only by a jack. That’s a recipe for disaster.
Working with heavy vehicles like the Subaru Ascent means you need to be extra mindful of the weight. Ensure your jack and stands are rated for the load. If anything feels unstable, stop and reassess.
Securing the Vehicle with Jack Stands
Once the car is lifted to the desired height, it’s time for the jack stands. These are your best friends for safety. Slide them under the designated support points on the frame, usually near the jacking points. Slowly lower the jack until the vehicle’s weight is resting securely on the jack stands. Give the car a gentle push to make sure it’s stable. Now you can remove the jack or leave it lightly in place as a backup, but the stands are doing the real work.
Removing the Wheels
Remember those lug nuts you loosened earlier? Now’s the time to finish the job. Use your lug wrench to completely unscrew them. Keep them together in a safe spot, maybe a small container, so you don’t lose them. Once all the lug nuts are off, grab the wheel firmly with both hands and pull it straight towards you. It might take a little wiggle. Set the wheel down flat on its side, out of the way. Repeat this for the other side you’re working on. It’s a good idea to put the removed wheel under the car’s frame as an extra safety precaution, just in case the jack stands fail.
Accessing and Removing Old Brake Components
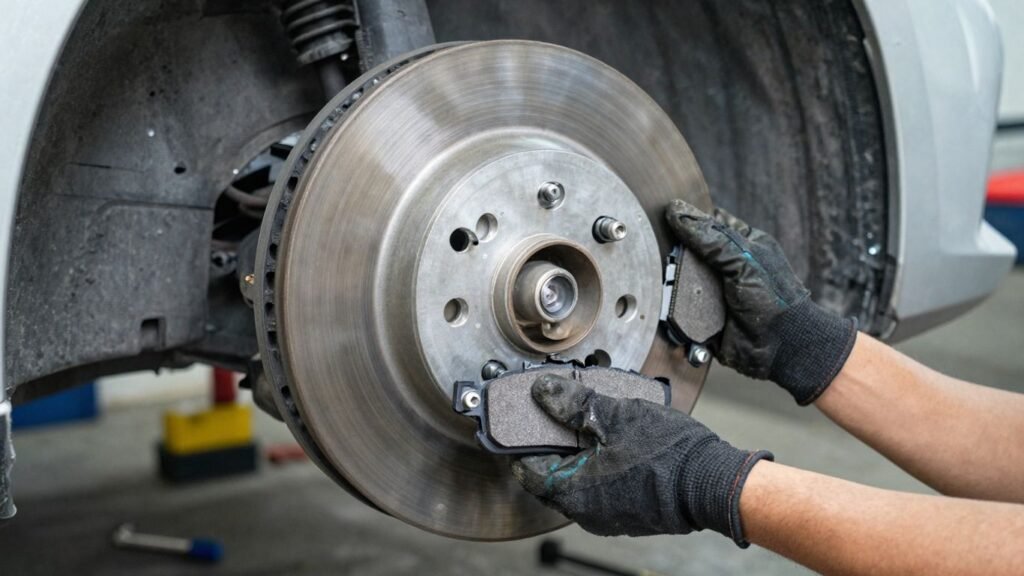
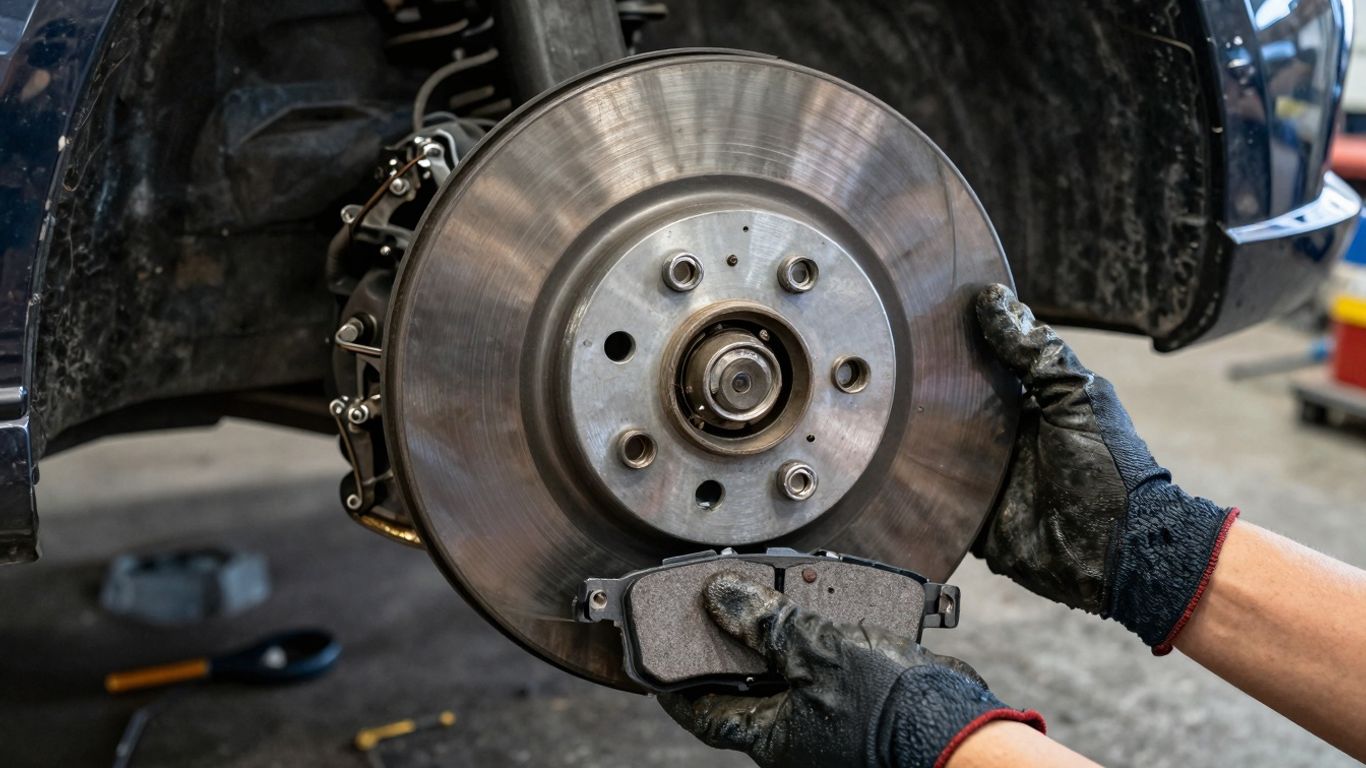
Inspecting Brake Pads and Rotors
Alright, with the wheel off, you’ve got a clear view of the brake setup. Take a good look at those brake pads. Are they worn down to almost nothing, or do they still have some life left? You’re looking for any deep grooves or uneven wear. Same goes for the rotor – that big metal disc behind the pads. If you see significant scoring, cracks, or a noticeable lip around the edge, it’s probably time for a new one. Don’t just guess here; a close inspection tells you what needs replacing.
Removing the Brake Caliper
Now, to get to the pads and rotor, you need to remove the brake caliper. It’s usually held in place by a couple of bolts on the back. You’ll need your socket wrench for these. Once those bolts are out, you should be able to carefully slide the caliper off the rotor. Don’t let the caliper just hang there by the brake hose! That’s a recipe for disaster. Use a bungee cord or a piece of wire to hang it up out of the way, maybe on the suspension spring. This protects the brake line from getting stretched or damaged.
Removing the Old Brake Rotor
With the caliper out of the way, the rotor should be accessible. Sometimes, there’s a small screw holding the rotor to the hub. If you see one, take it out. If not, the rotor might just slide off. If it’s stuck, a few gentle taps with a rubber mallet around the edge should do the trick. Be patient; you don’t want to force it and damage anything.
Remember to check the condition of the brake fluid reservoir cap. If it’s loose or damaged, it could let moisture into the system, which isn’t good for your brakes.
| Component | Condition to Watch For |
|---|---|
| Brake Pads | Less than 3mm thickness, uneven wear, cracking |
| Brake Rotors | Deep grooves, significant scoring, visible cracks, warping (causes pedal pulsation) |
Installing New Brake Pads and Rotors
Cleaning and Aligning the New Rotor
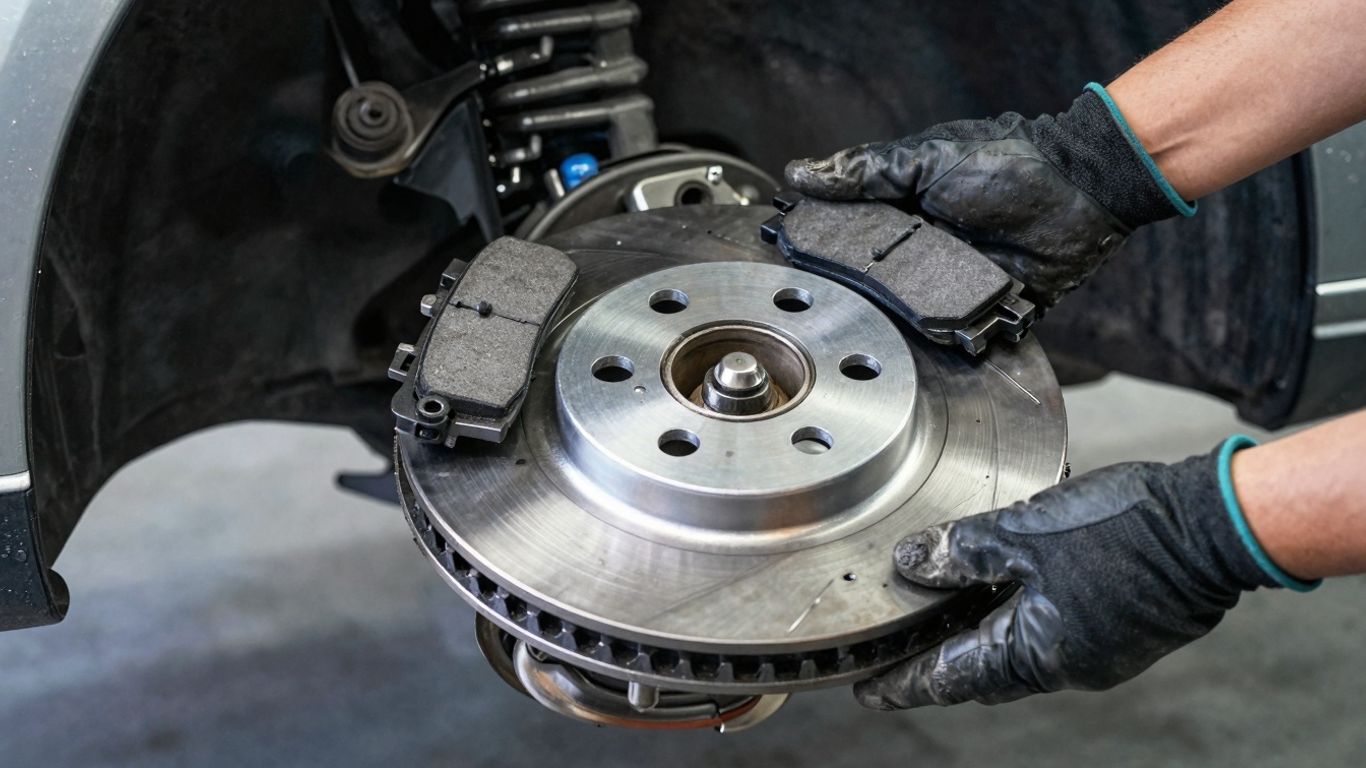
Alright, you’ve got the old stuff off. Now it’s time to get the shiny new parts on. First things first, grab that new rotor. Before it goes anywhere near your Subaru, give it a good wipe-down with some brake cleaner. Seriously, don’t skip this. Rotors come coated in a protective oil from the factory, and you don’t want that gunk interfering with your new pads. Once it’s clean, carefully slide it onto the wheel hub. Make sure it sits flat and flush against the mounting surface. It should feel pretty solid when it’s in place.
Installing the New Brake Pads
Now for the pads. These usually just slide into the caliper bracket you left in place. They might be a tight fit, which is good – you don’t want them rattling around. Make sure they’re seated evenly and properly in their spots. Some pads have little clips or shims that go with them, so check if your new ones came with any and install them according to the instructions. It’s really important that the new pads sit correctly in the bracket.
Lubricating Contact Points
This is a step a lot of people rush, but it makes a difference. You’ll want to put a thin layer of brake lubricant on a few key spots. Think about where the metal backing of the brake pad touches the caliper bracket, and where the caliper slides over the pad. A little dab here helps prevent squeaks and ensures everything moves smoothly. Just don’t get any of this grease on the actual friction material of the pad or the rotor surface – that’s a big no-no.
Remember to only use brake-specific lubricant. Regular grease or oil can damage the rubber seals in your caliper and won’t hold up to the heat.
| Component | Lubrication Point | Purpose |
|---|---|---|
| Brake Pad | Backing plate where it contacts caliper bracket | Reduce noise, prevent seizing |
| Caliper | Guide pins/bolts, pad contact edges | Ensure smooth movement, prevent sticking |
Reinstalling the Brake Caliper and Wheel Assembly
Positioning and Securing the Caliper
Alright, you’ve got those shiny new pads and rotors all set. Now it’s time to get the brake caliper back where it belongs. This part is pretty straightforward. You’ll want to carefully slide the caliper back over the new brake pads and the rotor. It should fit snugly, but don’t force it. If it feels like it’s binding, double-check that the pads are seated correctly and that the caliper piston isn’t sticking. Once it’s in place, reinsert the caliper bolts. Give them a good tighten with your wrench, but remember, snug is good – you don’t want to strip the threads or crack anything. Make sure the brake line isn’t twisted or pinched during this process; that’s a big no-no.
Reassembling the Wheel
With the caliper secured, you can now put the wheel back on. Lift the wheel and line up the bolt holes with the studs on the hub. Get the lug nuts started by hand, just to make sure everything is aligned properly. Then, use your wrench to snug them down in a star pattern. This helps the wheel seat evenly against the hub. Don’t go crazy tightening them just yet; we’ll do the final torqueing once the car is on the ground.
Lowering the Vehicle Safely
Now for the moment of truth – getting the car back down. Slowly and carefully lower your Subaru off the jack stands. Once the tires are firmly on the ground, you can go back to those lug nuts. Using a torque wrench is the best way to go here. Check your Subaru’s manual for the exact torque specification, but it’s usually around 90-100 lb-ft for most models. Tighten them in that same star pattern to ensure even pressure. Give the wheel a spin to make sure it turns freely without any rubbing or strange noises. If it spins smoothly, you’re in good shape.
Testing Your Subaru’s New Brakes
Initial Brake Pedal Check
Alright, you’ve put in the work, and those new pads and rotors are in place. Before you even think about driving, give that brake pedal a good pump. Do this a few times with the engine off. You want to feel that pedal firm up. If it feels spongy or goes all the way to the floor, something’s not right. This step is super important because it pushes the caliper pistons back out and seats the new pads against the rotor. It’s like waking up the brake system after its nap.
Performing a Test Drive
Once the pedal feels solid, it’s time for a cautious test drive. Start slow, maybe just around your block or in an empty parking lot. Gently apply the brakes at low speeds. Listen for any weird sounds and feel for any pulling or vibrations. Gradually increase your speed and braking intensity, but don’t go slamming on the brakes just yet. You’re looking for smooth, consistent stopping power. This initial drive helps bed in the new pads and rotors, which is a fancy way of saying they’re getting used to each other.
Listening for Unusual Noises
Pay close attention to any sounds your brakes make during that test drive. A little bit of noise when they’re brand new can happen as the pads and rotors settle in, but anything loud or concerning, like grinding, squealing, or clunking, needs attention. If you hear something off, pull over safely and re-check your work. Sometimes a bolt might be a little loose, or a pad might not be seated perfectly. It’s better to catch these small issues now than have a bigger problem later.
After installing new brake components, it’s a good practice to avoid hard braking for the first couple hundred miles. This allows the pads and rotors to properly mate, leading to optimal performance and longevity. Think of it as a break-in period for your brakes.
Common Mistakes During Subaru Brake Replacement
Skipping Essential Cleaning Steps
It’s easy to get excited about putting on those shiny new parts, but don’t rush past the cleaning. If you don’t properly clean the hub where the rotor sits, you might end up with a rotor that isn’t perfectly flat. This can cause vibrations when you brake. Also, make sure to clean the new rotor itself. Manufacturers often put a protective coating on them to prevent rust during shipping. You’ve got to wipe that off with brake cleaner before installing, or you’ll have greasy rotors that don’t grip well. Nobody wants that.
Using Incorrect Parts
This one seems obvious, but it happens. Grabbing the first set of brake pads and rotors you see without double-checking if they’re actually for your specific Subaru model can lead to big problems. They might look similar, but the fit could be off, or the material might not be right for your car’s weight and performance. Always verify the part numbers against your vehicle’s year, make, and model. It’s worth the extra minute to avoid headaches later.
Improper Bolt Tightening
When it comes to tightening bolts, there’s a sweet spot. Too loose, and things can wobble or come apart. Too tight, and you can strip the threads or even crack components. For the lug nuts that hold your wheels on, and especially the caliper bolts, using a torque wrench to tighten them to the manufacturer’s specifications is really important. It might seem like overkill, but it’s the best way to make sure everything is secure without causing damage. For example, lug nuts on a Subaru Outback might need to be torqued to around 85-100 ft-lbs, but always check your owner’s manual for the exact number.
Ignoring Brake Fluid and Testing
After you’ve finished putting everything back together, don’t just hop in and drive off. You need to pump the brake pedal a few times before you even start the engine. This pushes the caliper pistons back out and seats the new pads against the rotor. If you skip this, your first brake application might go straight to the floor, which is pretty alarming.
And after that initial pedal check, take your Subaru for a slow test drive. Listen for any weird noises and feel how the brakes are working. Make sure they feel firm and responsive. If anything seems off, pull over safely and re-check your work.
Wrapping Up Your Brake Job
So, you’ve gone through the steps, replaced those pads and rotors, and put everything back together. Nice job! Taking on a brake job yourself can feel pretty rewarding, and it’s a great way to save some cash. Just remember to take it easy on those new brakes for the first little while – they need a bit of time to settle in. If you ever feel unsure about any part of the process, or if something just doesn’t feel right after you’re done, don’t hesitate to reach out to a professional. For folks around Wenatchee, Cascade Subaru is always ready to help out with any brake service or repairs your Subaru might need. Drive safe out there!


